Survey Process
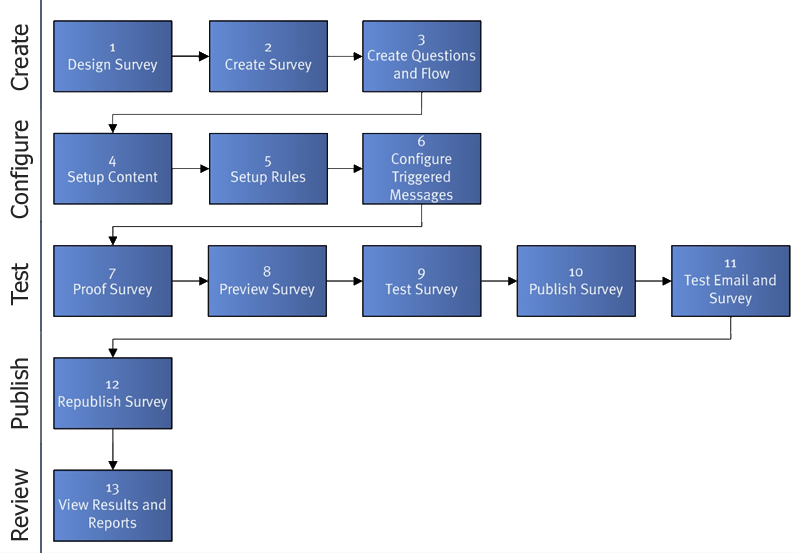
There is a lot that can be configured when creating a new Survey. Following this process for creating, testing and publishing a Survey will ensure that you don't miss anything out.

- Design Survey Before creating a new survey it is best to design the questions, branching and pagination on paper or a spreadsheet.
- Create Survey Create the Survey in the management console.
- Create Questions and Flow Create questions for the survey and configure branching logic and page breaks.
- Setup Content Configure the look and feel of the Survey. This is achieved by configuring the question design, Survey template and other content.
- Setup Rules Configure when the Survey will be available and who it will be available to on the Survey rules view.
- Configure Triggered Messages If this Survey is to trigger response messages configure these now.
- Proof Survey Proof the Survey to check any scoring and correct answers, branching logic and question content.
- Preview Survey Preview the Survey to check the look and feel are correct.
- Test Survey Test the Survey to try out the flow of the Survey and check again that any logic is working correctly.
- Publish Survey Publish the Survey so that you can test it on the website where participants will see it.
- Test Email and Survey Create an email Message to yourself with a link to the Survey. Complete the Survey by following the link to ensure that everything is working ok. Check your response and make sure that the answers appear as expected. You may wish to repeat this step several times to test out different scenarios.
- Republish Survey Publish the Survey again, creating a new sample so that any further responses are kept separate from your test data. Now that you have republished your Survey, clean up your test data by deleting the original sample.
- View Results and Reports You can now advertise the Survey and then view responses and reports in real time.
See Also |