|
|
|
|
|
Creating a Campaign
To create a Campaign
- From the Main Menu, click Campaigns.
- Click the Campaigns view. The Campaigns view will be displayed in the Workspace and the Component List will display a list of Campaigns in the partition.
- Click the New button on the Action Bar.
- A New Campaign window will be launched.
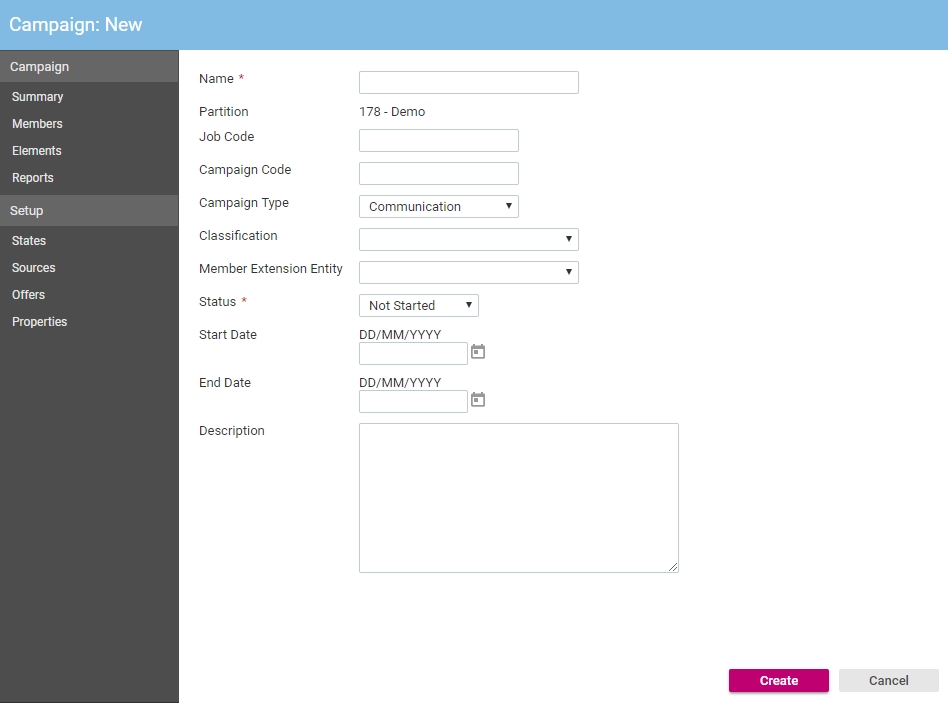
- In the Name text box, type a name for this Campaign. Remember that this is what is displayed in the Component List.
- If you have an internal reference or job code for this Campaign, type this in the Job Code text box.
- If you have an internal campaign code for this Campaign, type this in the Campaign Code text box.
- From the Campaign Type list, click the type of Campaign that this is. There are two options:
- General is the default option and is suitable for most Campaigns.
- Invitation will automatically configure invitation response states when the Campaign is created.
- From the Status list, click the initial status for this Campaign. This can be modified in the future. The default and most common option is Not Started.
- Click the Start Date Calendar
 button to display the date selection calendar or type the start date in the Start Date text box.
 - Click the End Date Calendar button to display the date selection calendar or type the end date in the End Date text box.
- In the Description text box type a short description for this Campaign.
- Click the Create button.
You should now add Campaign elements to your Campaign. You may also wish to add Campaign members.
See Also |