Creating a Web Document
When creating a new web document the following process should be followed:
- Create a new web document in a draft state.
- Edit content by authoring new content to convey your message to the intended audience. This includes adding any images or attachments to the document.
- Test the document before publishing it. Use the preview function to ensure that it behaves as expected. Remember to check the document in a variety of browsers.
- Publish the document to make it available on the website.
To create a new Web Document
- From the Site Manager Website view, click the folder you wish to view web documents from.
- From the Action bar, click the New button.
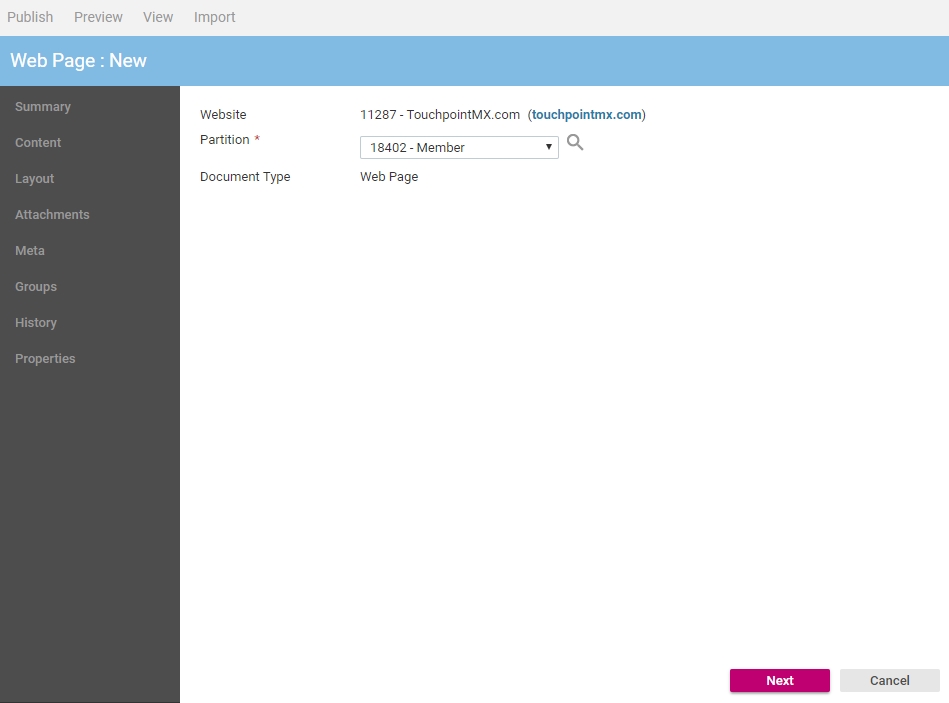
- The New Document window will be displayed.

- From the Partition list, click the partition you would like this page to belong to. This is so that when a document contains interactive data it will be collected from or stored in the correct partition. For example, a Website may contain a registration form. This is associated with a partition so that when a Contact registers they will be added to the correct partition.
- Click the Next button to continue.

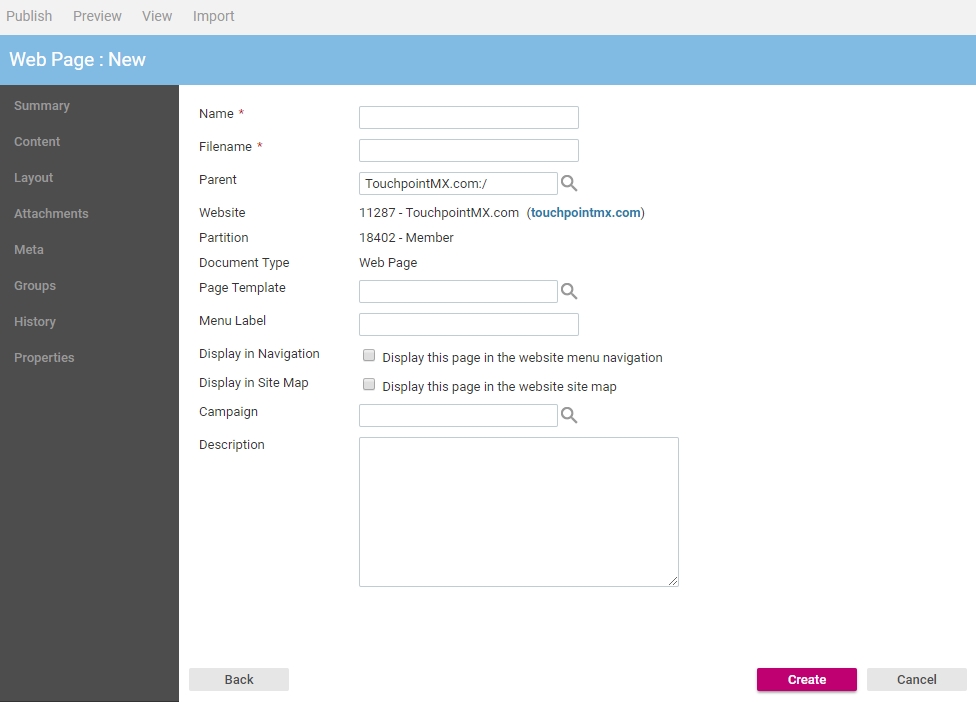
- In the Name text box, type a unique name that identifies this web document. The name is only used within the management console.
- In the Filename text box, type a file name and file name extension. For example, contact.html. This will form part of the URL to access this web document once it is published.
- When possible it is recommended the web document content be based on a template. Click the Template Selector
 button to display the Select Template dialog.
Click the template you wish to use and click the Select button.
- If this web document is part of a Campaign, click the Campaign Selector
 button to display the Select Campaign dialog.
 - Click the Campaign you wish to use and click the Select button.
- In the Description text box type a short description for this document.
- Click the Create button.
- The document will be created in a draft (not published) state and the Content view will be displayed.
- Using the WYSIWYG editor, add content to the page.
- Click the Save button.
In This Section |
See Also |